
Wet Attic Woes: Why Condensation, Not Leaks, is Often the Real Problem
You head into the attic, and the scene stops you cold. The wood overhead glistens, droplets cling to nails, and you can hear the occasional “drip” landing on insulation. It feels urgent, like a roof problem about to spiral into major repairs. The concern goes deeper than replacing shingles. You’re wondering if there’s mold, if the air in your home is safe, and how fast the damage could spread.
That uncertainty is where most homeowners get stuck. It’s easy to assume any attic moisture is a leak, but a soaked roof deck, especially when wetness is spread evenly across large areas, often points to condensation instead. Warm, humid air from inside the house is finding its way into the attic, hitting a cold roof deck, and turning into liquid water. The fix follows a strict sequence: seal the ceiling plane, insulate to the right level, set ventilation correctly, and manage indoor humidity. For mold remediation Morris County NJ homeowners can trust, starting with this diagnosis is the difference between chasing symptoms and solving the cause.
Recognizing Condensation Before You Call a Roofer
When you can read the signs, you can choose the right professional. Condensation paints a wide picture, uniform sheen on the roof sheathing, droplets on nails throughout the attic, and water appearing in many spots at once. Roof leaks behave differently. They create localized staining or rot that traces back to a specific penetration, flashing, or section of damaged shingles.
Leak vs. condensation patterns
1. Condensation: Even wetness across multiple bays, damp or frosted fasteners everywhere, and moisture that appears after shifts from cold nights to milder mornings.
2. Leaks: Brown streaks or concentrated rot under a single roof feature, with water damage that follows gravity in a narrow path.
A quick attic check with a flashlight can often show the difference. If you find bath fans venting into the attic, gaps around recessed lights, or an attic hatch without weatherstripping, warm indoor air is taking a direct path to the cold roof deck.
Why Your Attic Makes Its Own Water
Condensation happens when humid air meets a surface colder than the temperature that air can hold moisture. In your home, warm indoor air seeps through openings in the ceiling and hits the roof deck, which is cooled by outdoor conditions. That cold deck acts like the outside of a chilled glass, and moisture in the air condenses on contact.
Every day living adds to the moisture load, such as showers, cooking, laundry, and even humidifiers. The more humidity inside, the higher the risk when that air escapes upward. Winter increases the odds because roof decks often run much colder than the living space, but the same chain of events can happen in shoulder seasons during temperature swings.
Common leak points include:
· Recessed lighting: Small gaps around fixtures can funnel warm air directly into the attic.
· Attic hatches: Without weatherstripping and proper latches, they leak constantly.
· Plumbing and wiring penetrations: Holes cut for pipes, cables, and ducts are rarely sealed air-tight.
· Improperly vented fans: Bathroom and kitchen exhaust that ends in the attic injects warm, moist air right where it shouldn’t be.
Finding and sealing these leaks is the first step toward breaking the cycle.
Why Moisture Can’t Be Ignored
Persistent condensation doesn’t just leave a damp look; it changes materials and air quality. Wood can swell, plywood and OSB can delaminate, and fasteners can corrode until they lose strength. Wet insulation slumps and loses its ability to keep heat in, making your home less efficient and more uncomfortable.
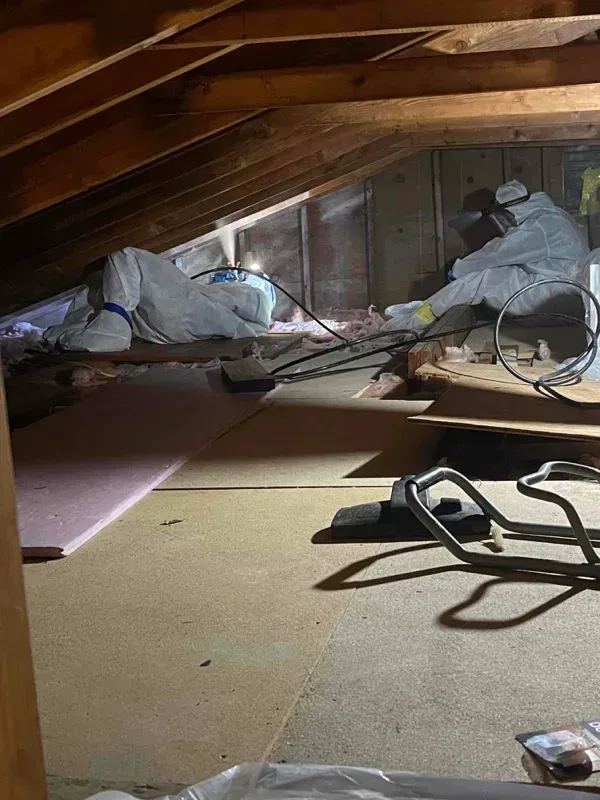
Moisture plus wood creates an ideal environment for mold. Growth often starts on the underside of the sheathing and framing, where you might not see it from the living space. Spores can travel with air currents, potentially affecting indoor air quality. Sensitive individuals may notice symptoms first, but long-term dampness is a risk for everyone. Addressing moisture and removing mold restores both structural integrity and a healthy indoor environment.
Fix it in This Exact Order
The most reliable solution follows a sequence because each step supports the next. Skipping ahead or mixing the order wastes time and money.
1. Seal the ceiling plane first: Treat the ceiling between the living space and attic as your primary air barrier. Seal gaps around recessed lights, use weatherstripping on the attic hatch, and foam or caulk around plumbing and wiring penetrations. A blower-door test paired with infrared imaging can pinpoint hidden leaks and confirm that the sealing work made a measurable difference.
2. Then insulate to the right level: Once air leaks are sealed, insulation keeps the ceiling surface warmer and reduces the chance of condensation. In colder zones, R-49 is a common target, but the exact number depends on your climate. Ensure even coverage and keep insulation from blocking airflow at the eaves by using baffles.
3. Set ventilation the smart way: Balanced ventilation allows the attic to dry without creating shortcuts that reduce effectiveness. Continuous soffit intake and a ridge vent are a proven pair. Keep a two-inch clear channel at the eaves so air can move from the soffit to the ridge, and never vent bathroom or kitchen fans into the attic.
4. Manage indoor humidity every day: Aim for 30–50% relative humidity inside your home. Use exhaust fans during and after activities that add moisture, and make sure they vent outdoors. In tighter homes, consider balanced mechanical ventilation like an HRV or ERV. This daily management protects the improvements you’ve made in sealing, insulation, and ventilation.
How to Confirm the Problem is Solved
Verification matters as much as the repair work. After sealing and insulating, repeat the blower-door test to confirm air leakage has dropped. Use a hygrometer to track indoor humidity and keep it within the target range.
A simple visual check after a cold night, followed by a milder morning, can also tell you a lot. If the roof deck stays dry and fasteners are free of beads or frost, your system is working. If moisture reappears, it’s a sign to recheck for missed air leaks, blocked vents, or humidity spikes indoors.
Taking the Next Confident Step
If you discover widespread wetness or visible mold in your attic, resist the urge to start with roof work. Begin with a professional assessment that can confirm whether you’re dealing with condensation, a true leak, or both. A certified mold inspector can identify growth and its extent. A Building Performance Institute–certified contractor can test for air leaks, design an insulation plan, and set ventilation correctly. A roofer comes in if flashing or vent paths need correction.
For mold remediation Morris County NJ residents can rely on, pairing moisture control with safe cleanup is critical. Once mold is removed and the root cause addressed, the attic stays dry, the air stays cleaner, and the structure stays sound—no matter the season.
Ready to stop attic condensation before it causes costly damage? Schedule a comprehensive attic inspection that includes moisture source identification, air leakage testing, and a step-by-step plan to seal, insulate, ventilate, and control humidity. You’ll have clear data, photos, and a priority list you can act on with confidence.